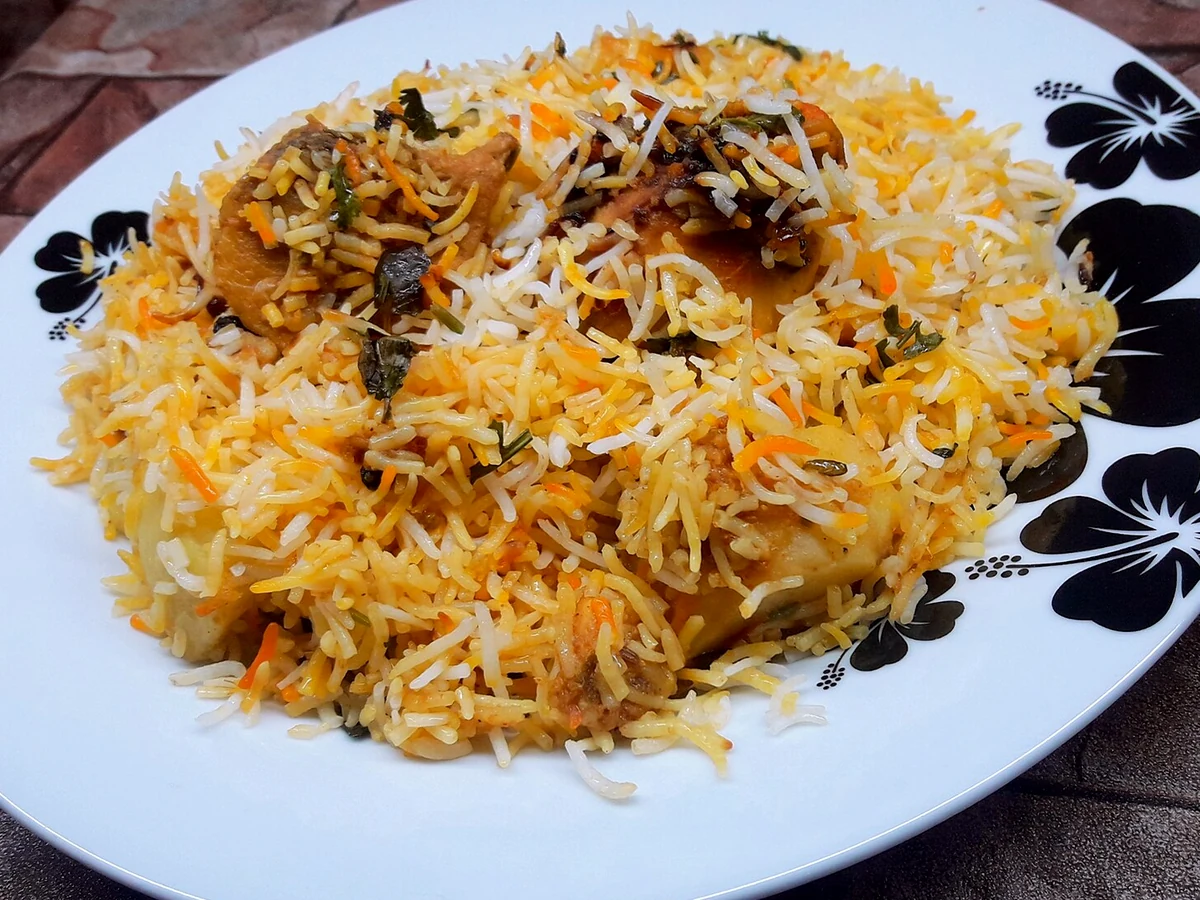
Mutton Biryani Recipe
مٹن بریانی
Pakistani mutton biryani with tender bone-in mutton masala layered with fragrant basmati rice, fried onions, herbs, green chillies and lemon, then finished on dum.
Key cooking point: Simmer the mutton until it yields easily to a fork before layering; the final dum is not a substitute for tenderising tough meat.
نرم مٹن، باسمتی چاول، دہی، ٹماٹر، تلی ہوئی پیاز، پودینہ اور خوشبودار مصالحوں کی تہوں سے تیار ہونے والی مٹن بریانی۔
اہم بات: تہ لگانے سے پہلے مٹن مکمل نرم کر لیں کیونکہ دم کا مرحلہ بنیادی طور پر چاول مکمل کرنے کے لیے ہے۔

Ingredients for Mutton Biryani
- 1 kg mutton, bone-in serving pieces
- 4 cups basmati rice, rinsed and soaked
- 1 cup plain yogurt, whisked smooth
- 3 onions, thinly sliced
- 3 tomatoes, chopped
- 2 tbsp ginger-garlic paste
- 3 tbsp biryani masala
- Fresh mint and coriander, chopped
- 4 green chillies
- 1 lemon
- Whole garam masala, for the rice
- Salt to taste and cooking oil, as needed
How to Make Mutton Biryani — Step by Step
- Step 1Rinse the basmati until the water becomes much clearer, soak for about 30 minutes or as appropriate for your rice, then drain.
- Step 2Heat oil and fry the sliced onions until evenly golden. Reserve some for layering, then add the mutton and ginger-garlic paste and cook until the meat loses its raw colour.
- Step 3Add the tomatoes, biryani masala, salt and whisked yogurt gradually. Cook the masala well, then add water as needed and simmer covered until the mutton is tender and the gravy is concentrated rather than watery.
- Step 4Meanwhile, boil plenty of salted water with the whole garam masala. Add the drained rice and cook only until partly cooked and still firm enough to finish during dum, then drain promptly.
- Step 5Layer the mutton masala and rice with reserved fried onion, mint, coriander, green chillies and lemon, handling the rice gently so the grains do not break.
- Step 6Cover the pot tightly and cook on low heat for about 20 minutes, adjusting for your pot and stove, until the rice is tender and aromatic.
- Step 7Rest the biryani covered for a few minutes, then lift and fluff gently from the sides before serving with raita and salad.
Technique That Matters
Mutton tenderness must be achieved before the final rice dum. Simmer the meat in its yogurt-tomato masala until it yields easily, then reduce the gravy to a coating consistency. Dum should finish the rice and marry the layers—not serve as the main tenderising stage for tough mutton.
Visual & Doneness Cues
- Mutton should be tender enough to yield to a fork before layering.
- The masala should be rich and reduced, with no large pool of watery liquid.
- Parboiled basmati should be firm in the centre when drained.
- After resting, rice grains should be tender and separate while the mutton remains moist.
Mutton Biryani Cooking Tips
- Simmer the mutton until it yields easily to a fork before layering; the final dum is not a substitute for tenderising tough meat.
- Reduce the meat masala until it coats the pieces instead of leaving a pool of thin gravy that can make the rice soggy.
- Parboil basmati rice only until the grains are elongated but still firm in the centre, since they will finish cooking on dum.
- Taste and correct the salt in the meat masala and rice water before layering; it is difficult to season the centre evenly afterwards.
- Seal the pot well and keep dum heat low; place a tawa under a thin pot if the base scorches easily.
- Rest the biryani covered after dum, then lift from the sides with a flat spoon to keep the rice grains intact.
Mistakes to Avoid
- Layering tough mutton and expecting a short dum to tenderise it.
- Adding large amounts of water late in the meat stage and failing to reduce it before rice.
- Overcooking basmati while waiting for mutton to finish.
- Using high direct heat for the whole dum and scorching the base.
Substitutions & Adjustments
- Bone-in mutton gives the biryani more body; boneless pieces can cook faster but still need tenderness before layering.
- If your mutton is from a tougher cut, allow more covered simmering rather than increasing dum time.
- Adjust packaged biryani masala for salt and chilli before using the full amount.
Storage & Reheating
Storage: Cool promptly and refrigerate covered. Keep fresh raita and salad separately.
Reheating: Sprinkle a little water over a portion, cover and reheat gently until meat and rice are steaming hot; avoid repeated reheating of the full pot.
Questions About Mutton Biryani
Why is mutton biryani meat tough?
The meat needed more gentle covered cooking before layering. A normal dum is too short to rescue genuinely tough mutton.
Can I cook mutton separately from the rice?
Yes. In fact, finishing meat tenderness and gravy consistency before layering gives better control.
Why is the bottom wet?
The mutton masala was probably too loose or the rice carried excess water after draining.
اجزاء
- 1 کلو ہڈی والا مٹن
- 4 کپ باسمتی چاول
- 1 کپ سادہ دہی
- 3 پیاز، باریک کٹی ہوئی
- 3 ٹماٹر، کٹے ہوئے
- 2 کھانے کے چمچ ادرک لہسن پیسٹ
- 3 کھانے کے چمچ بریانی مصالحہ
- تازہ پودینہ اور ہرا دھنیا
- 4 ہری مرچیں
- 1 لیموں
- ثابت گرم مصالحہ
- نمک اور کوکنگ آئل
مٹن بریانی بنانے کا طریقہ — مرحلہ وار
- مرحلہ 1باسمتی چاول دھو کر 30 منٹ بھگو دیں۔ گوشت پکانا شروع کرنے سے پہلے پیاز کاٹ لیں اور جڑی بوٹیاں تیار رکھیں۔
- مرحلہ 2تیل گرم کر کے پیاز گہری سنہری ہونے تک فرائی کریں۔ تقریباً ایک تہائی پیاز تہیں لگانے کے لیے نکال لیں اور باقی دیگچی میں رہنے دیں۔
- مرحلہ 3ادرک لہسن پیسٹ اور مٹن شامل کریں۔ 8 سے 10 منٹ بھونیں، پھر ٹماٹر، دہی، بریانی مصالحہ اور نمک ڈالیں۔
- مرحلہ 4مٹن مصالحہ پکائیں یہاں تک کہ ٹماٹر گل جائیں اور کناروں پر تیل نظر آنے لگے۔ تھوڑا گرم پانی ڈال کر ڈھکیں اور مٹن گلنے تک ہلکی آنچ پر پکائیں۔
- مرحلہ 5بھیگے ہوئے چاول کافی نمک والے پانی اور ثابت مصالحوں کے ساتھ تقریباً 70 سے 75 فیصد پکائیں، پھر فوراً چھان لیں۔
- مرحلہ 6مٹن مصالحہ اور چاول تلی ہوئی پیاز، پودینہ، ہرا دھنیا، ہری مرچ اور لیموں کے ساتھ تہوں میں لگائیں۔
- مرحلہ 7اچھی طرح ڈھانپ کر سب سے ہلکی آنچ پر 18 سے 20 منٹ دم دیں تاکہ چاول مکمل پک جائیں اور گوشت خشک نہ ہو۔
- مرحلہ 8آنچ بند کرنے کے بعد 10 منٹ آرام دیں۔ سرو کرنے سے پہلے کنارے اور نیچے سے نرمی سے مکس کریں۔
اہم ہدایات
شروع کرنے سے پہلے پوری ترکیب پڑھ لیں، تمام اجزاء ناپ لیں اور کٹنگ، بھگونے یا میرینیٹ کرنے کا کام پہلے مکمل کر لیں۔
جلد ٹھنڈا کر کے فریج میں 2 دن تک رکھیں اور دوبارہ اچھی طرح گرم کریں۔
مزید بہتر نتیجے کے لیے ٹپس
- چاول تین چوتھائی پکنے پر فوراً چھانیں تاکہ دانے نرم ہو کر نہ ٹوٹیں۔
- مصالحے میں اتنی نمی رکھیں کہ چاول ذائقہ جذب کریں مگر نیچے پانی جمع نہ ہو۔