Chicken Biryani Recipe
چکن بریانی
Pakistani chicken biryani layers fragrant basmati rice, spiced chicken, fried onions and herbs, then finishes on dum.
Key cooking point: Drain the rice as soon as it is mostly cooked but the centre is still slightly firm; it will finish steaming during dum.
خوشبودار باسمتی چاول، مصالحے دار چکن، تلی ہوئی پیاز، دہی اور تازہ جڑی بوٹیوں کی تہوں سے تیار ہونے والی کلاسک پاکستانی چکن بریانی۔
اہم بات: تہ لگانے سے پہلے چاول مکمل نہ پکائیں؛ باقی پکائی دم کے دوران ہوتی ہے۔
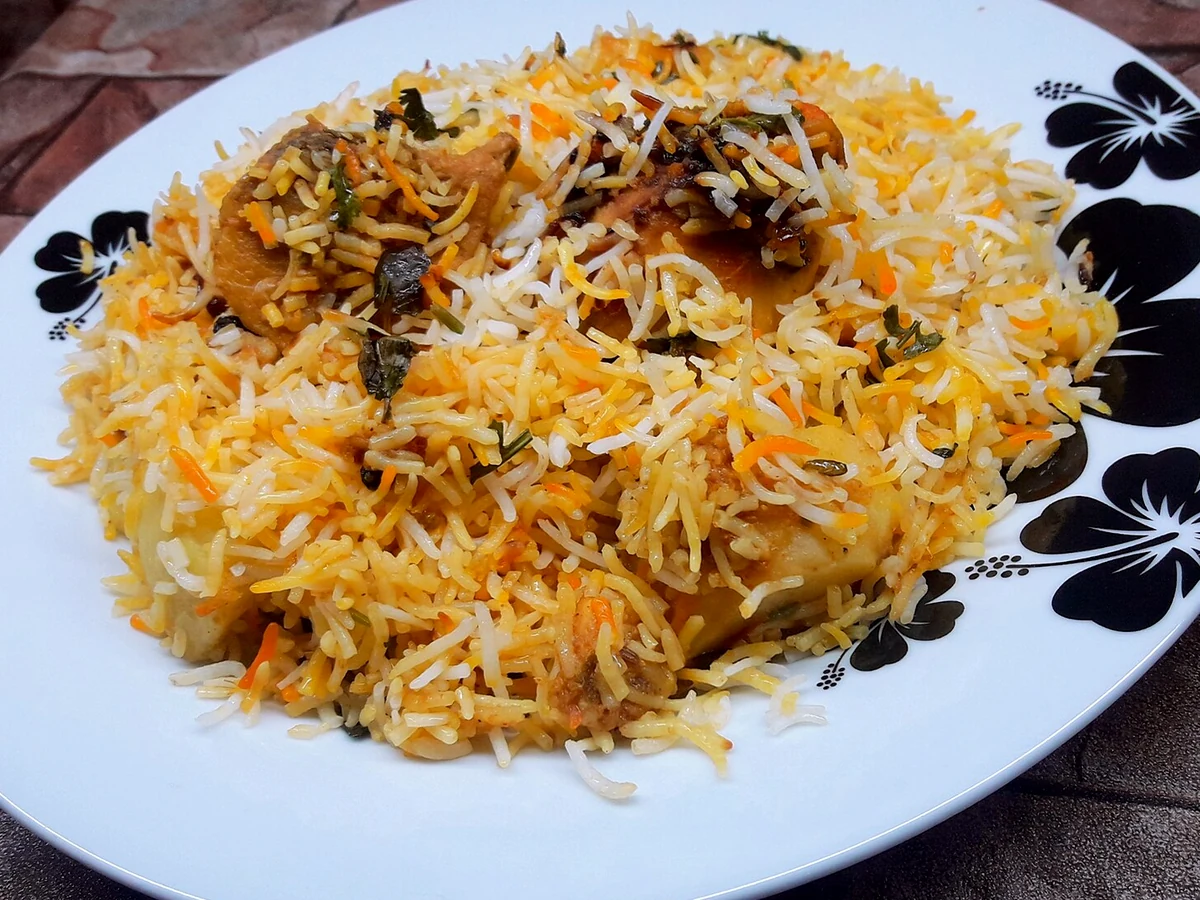
Ingredients for Chicken Biryani
- 750 g bone-in chicken
- 3 cups basmati rice
- 3 large onions, thinly sliced
- 3 medium tomatoes, chopped
- 1 cup plain yogurt
- 2 tbsp biryani masala, or to taste
- 2 tbsp ginger-garlic paste
- 4 green chillies, slit
- ½ cup chopped mint and coriander
- ½–¾ cup neutral cooking oil
- Salt, to taste
- 1–2 tbsp lemon juice, optional
How to Make Chicken Biryani — Step by Step
- Step 1Rinse the basmati until the water becomes much clearer, soak for about 30 minutes or as appropriate for your rice variety, then drain well.
- Step 2Heat the oil in a heavy pot and fry the sliced onions until evenly deep golden. Remove about half for layering, taking care not to let them become burnt or bitter.
- Step 3Add the ginger-garlic paste and chicken to the remaining onion and cook until the chicken loses its raw exterior colour. Add the biryani masala, tomatoes, green chillies and salt and cook until the tomatoes soften.
- Step 4Lower the heat and stir in the whisked yogurt gradually. Cook until the chicken is nearly tender and the masala is concentrated rather than watery; add the optional lemon juice after tasting the balance.
- Step 5Meanwhile, boil plenty of well-salted water. Add the drained rice and cook only until partly cooked with a firm centre, then drain promptly so it can finish during dum.
- Step 6Layer half the rice over the chicken, scatter over some mint, coriander and reserved fried onion, then add the remaining rice and garnishes without compressing the grains.
- Step 7Cover tightly and cook over very low heat until the rice is fully tender and aromatic. Rest covered off the heat for about 10 minutes, then gently lift from the sides to combine without crushing the rice.
Technique That Matters
The two stages that decide the texture are the rice parboil and the moisture level of the chicken masala. Drain the rice while the centre is still firm enough to finish on dum, and reduce the masala until it coats the chicken instead of leaving a pool of thin gravy.
Visual & Doneness Cues
- Fried onions should be evenly deep golden; very dark edges can make the biryani bitter.
- Before layering, the chicken should be nearly tender and the masala should cling to it with no large pool of watery liquid.
- Parboiled rice should bend but still have a firm centre when bitten; it finishes cooking during dum.
- After dum and a short rest, the grains should be fully tender yet distinct rather than wet or clumped.
Chicken Biryani Cooking Tips
- Drain the rice as soon as it is mostly cooked but the centre is still slightly firm; it will finish steaming during dum.
- Reduce the chicken masala until it clings to the chicken instead of leaving watery gravy at the bottom of the pot.
- Taste the masala before layering and adjust salt then; seasoning is harder to distribute evenly once the rice is on top.
- Spread the rice and masala in even layers so one section does not become wet while another stays dry.
- Keep dum heat very low and use a flat tawa under a thin pot if the base tends to scorch.
- Let the biryani rest briefly after dum, then lift portions gently from the side of the pot to keep the grains intact.
- For the rice parboil, use a large pot of rapidly boiling water so the grains can move freely. Salt the water until it tastes pleasantly seasoned, drain as soon as the grain bends but still has a firm centre, and do not leave the drained rice sitting in hot water.
- If the drained rice must wait before layering, spread it briefly in a wide tray rather than leaving it piled in a hot colander, where residual steam can keep softening the grains.
- If the rice is already fully tender before layering, shorten the dum and handle the layers gently; prolonged steaming can make the lower rice soft. If the chicken masala is still watery, reduce it before adding the rice rather than trying to evaporate excess liquid during dum.
Mistakes to Avoid
- Cooking the rice until completely tender before layering; the final steam can then turn it soft or mushy.
- Layering over a watery masala, which sends excess steam into the rice.
- Mixing or pressing the layers aggressively; long cooked basmati breaks easily.
- Using strong direct heat for the full dum period; a thin pot may scorch before the top layer finishes.
Substitutions & Adjustments
- Bone-in chicken gives the masala more flavour; boneless thigh can be used but usually cooks faster, so reduce the masala without overcooking the meat.
- If your biryani masala is very salty or hot, start with less than the listed amount and adjust after the tomato-yogurt base has cooked.
- Lemon juice is optional; use it only if the finished masala needs extra acidity.
Storage & Reheating
Storage: Transfer leftover chicken biryani into shallow containers and refrigerate within 2 hours. Use within 3–4 days, or freeze for longer storage. Cool rice dishes promptly; do not leave cooked rice at room temperature for an extended period.
Reheating: Take out only the portion needed, sprinkle with a little water, cover and reheat until the chicken and rice are steaming hot throughout. Avoid repeatedly reheating the full batch.
Questions About Chicken Biryani
How cooked should the rice be before layering?
It should be partly cooked with a firm centre, not ready to eat. The exact minute count depends on the rice, so judge the grain rather than relying only on a timer.
Why does chicken biryani become mushy?
The most common combination is over-parboiled rice plus excess liquid in the masala. Poor draining and an overly long or hot dum can make the problem worse.
Should biryani be mixed after dum?
Rest it briefly first, then lift portions gently from the side so the masala and rice combine without crushing the grains.
How can I stop the top rice drying out during dum?
Make sure the masala is not dry before layering, distribute the rice evenly, seal the lid well and keep the heat very low. If your pot has a thin base, place it on a tawa to soften direct heat; avoid repeatedly opening the lid because that releases steam.
اجزاء
- 750 گرام ہڈی والا چکن
- 3 کپ باسمتی چاول
- 3 پیاز، باریک کٹی ہوئی
- 3 ٹماٹر، کٹے ہوئے
- 1 کپ سادہ دہی
- 2 کھانے کے چمچ بریانی مصالحہ
- 2 کھانے کے چمچ ادرک لہسن پیسٹ
- 4 ہری مرچیں
- ½ کپ پودینہ اور ہرا دھنیا
- نمک اور کوکنگ آئل حسبِ ضرورت
چکن بریانی بنانے کا طریقہ — مرحلہ وار
- مرحلہ 1باسمتی چاول اس وقت تک دھوئیں جب تک پانی کافی حد تک صاف نہ ہو جائے، پھر انہیں 25 سے 30 منٹ تازہ پانی میں بھگو دیں۔ ابالنے سے پہلے پانی اچھی طرح نکال دیں تاکہ چاول زیادہ پانی نہ جذب کریں۔
- مرحلہ 2بھاری دیگچی میں درمیانی آنچ پر تیل گرم کریں اور کٹی ہوئی پیاز گہری سنہری ہونے تک فرائی کریں۔ تقریباً ایک تہائی پیاز تہیں لگانے کے لیے نکال لیں اور باقی دیگچی میں رہنے دیں۔
- مرحلہ 3ادرک لہسن پیسٹ اور چکن شامل کریں۔ 6 سے 8 منٹ چکن کو الٹ پلٹ کر بھونیں یہاں تک کہ رنگ بدل جائے اور ہلکا سا براؤن ہونا شروع ہو۔
- مرحلہ 4ٹماٹر، دہی، بریانی مصالحہ، ہری مرچیں اور نمک ڈالیں۔ درمیانی آنچ پر 10 سے 12 منٹ پکائیں اور وقفے وقفے سے ہلاتے رہیں، یہاں تک کہ ٹماٹر نرم ہو جائیں اور مصالحہ گاڑھا اور چمکدار ہو جائے۔
- مرحلہ 5ضرورت ہو تو تھوڑا سا پانی ڈالیں، ڈھک کر چکن تقریباً گلنے تک پکائیں۔ مصالحہ گاڑھا رہنا چاہیے کیونکہ زیادہ پانی چاولوں کو نرم اور چپچپا کر سکتا ہے۔
- مرحلہ 6دوسری طرف کافی مقدار میں نمک والا پانی اُبالیں۔ بھیگے ہوئے چاول ڈال کر تقریباً 70 سے 75 فیصد پکائیں؛ دانہ باہر سے نرم مگر درمیان سے ہلکا سخت ہونا چاہیے۔ فوراً چھان لیں۔
- مرحلہ 7چکن مصالحے پر آدھے چاول پھیلائیں۔ پودینہ، ہرا دھنیا اور کچھ تلی ہوئی پیاز ڈالیں، پھر باقی چاول، جڑی بوٹیاں اور پیاز اوپر ڈال دیں۔
- مرحلہ 8دیگچی اچھی طرح ڈھانپ کر بہت ہلکی آنچ پر 15 سے 20 منٹ دم دیں۔ آنچ بند کر کے 10 منٹ آرام دیں، پھر کناروں سے نرمی سے پلٹیں تاکہ چاول کے دانے الگ رہیں۔
اہم ہدایات
شروع کرنے سے پہلے پوری ترکیب پڑھ لیں، تمام اجزاء ناپ لیں اور کٹنگ، بھگونے یا میرینیٹ کرنے کا کام پہلے مکمل کر لیں۔
بریانی کو جلد ٹھنڈا کر کے ڈھکے ہوئے برتن میں فریج میں 2 دن تک رکھیں۔ دوبارہ کھاتے وقت صرف مطلوبہ مقدار اچھی طرح گرم کریں یہاں تک کہ بھاپ نکلنے لگے۔
مزید بہتر نتیجے کے لیے ٹپس
- چاول ڈالنے سے پہلے چکن کا مصالحہ گاڑھا رکھیں تاکہ بریانی گیلی نہ ہو۔
- دم کے بعد بریانی کو چند منٹ آرام دیں، اس سے دانے مضبوط رہتے ہیں اور کم ٹوٹتے ہیں۔


